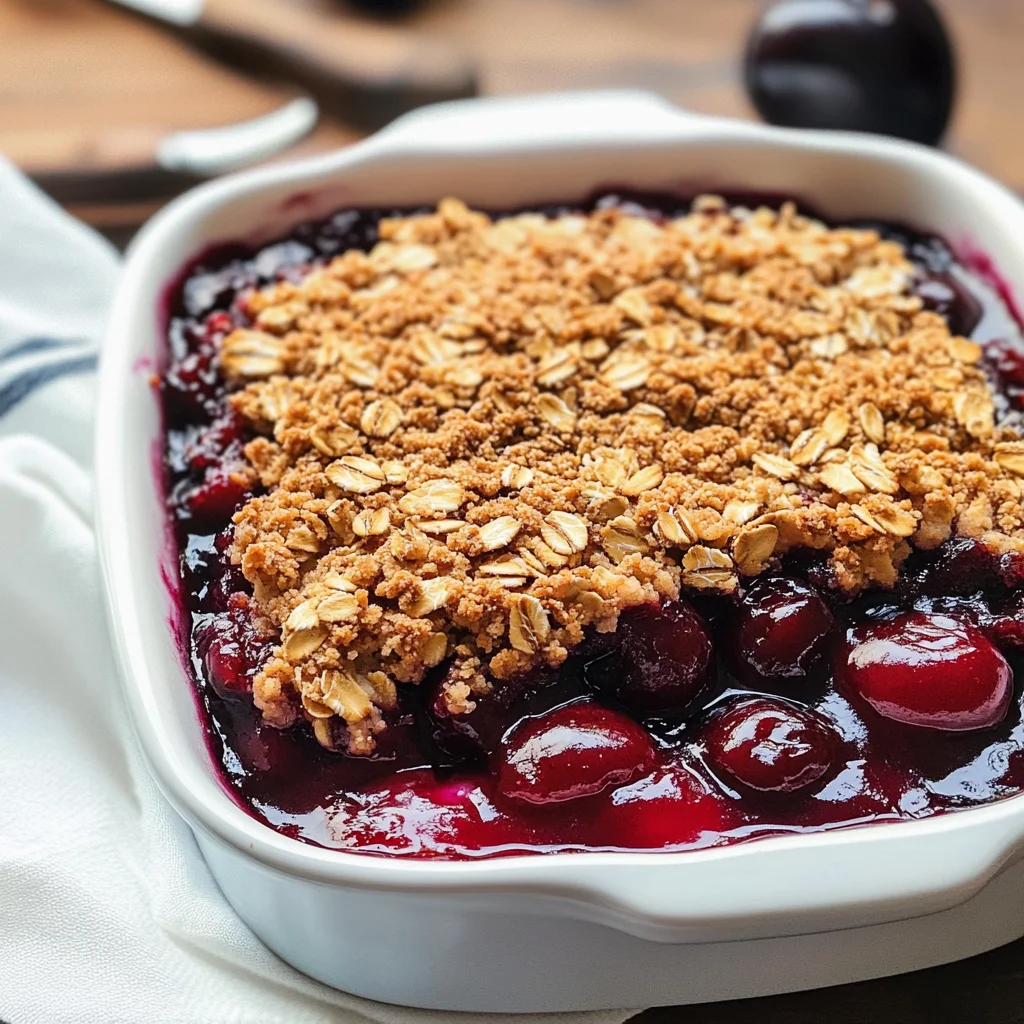
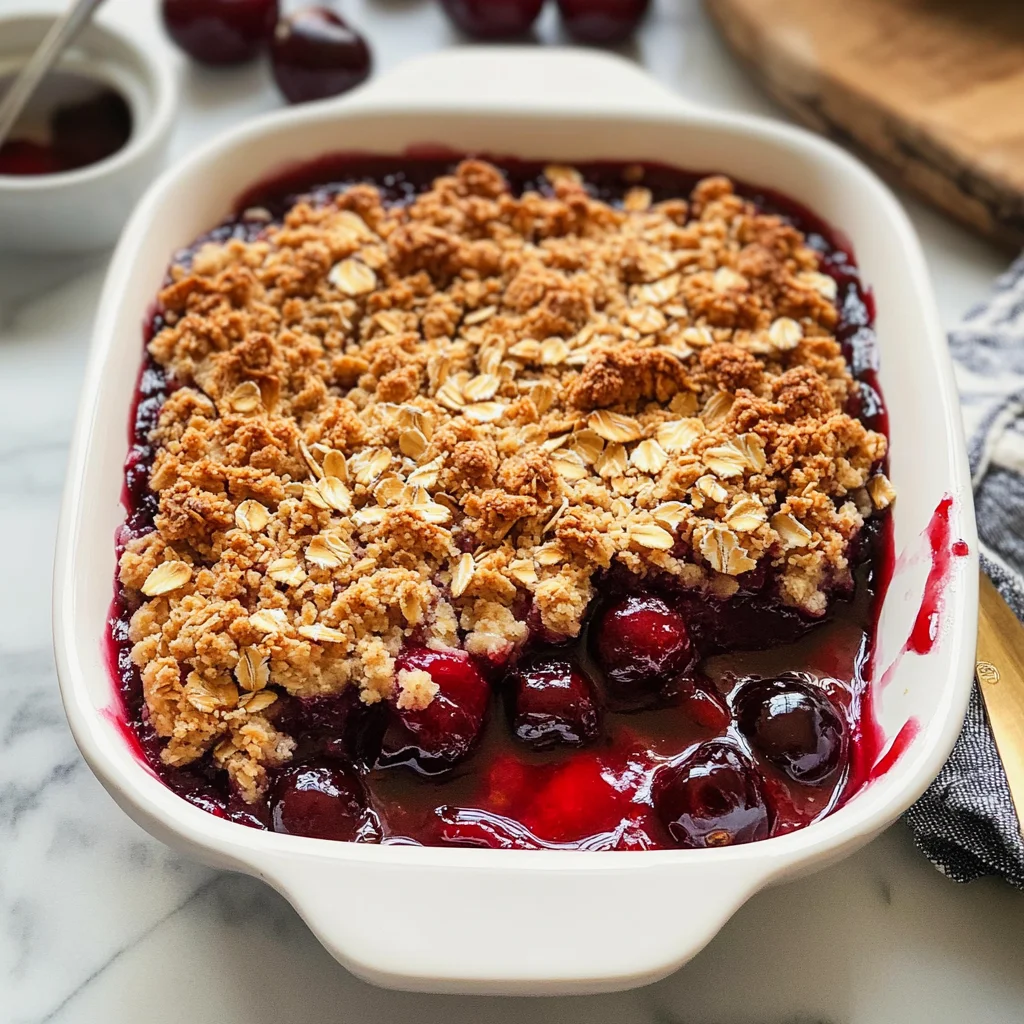
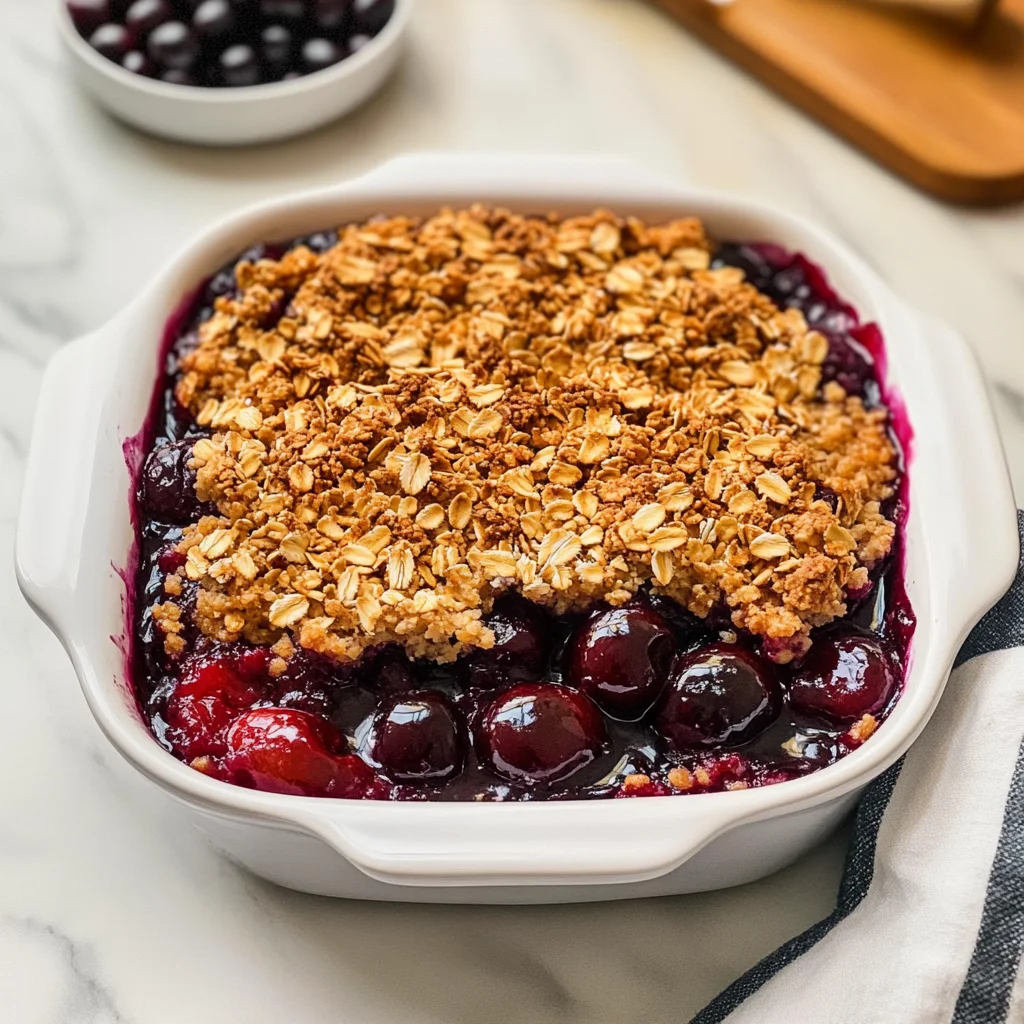
This Cherry Crisp is the perfect dessert to satisfy your sweet tooth. Combining juicy cherries with a crumbly oat topping, it’s a delightful treat for any occasion. Whether you’re hosting a dinner party or enjoying a cozy night in, this recipe is a crowd-pleaser. Serve it warm with vanilla ice cream for an unforgettable experience that highlights the rich flavors of cherry.
Why You’ll Love This Recipe
- Quick and Easy: With simple steps, you can whip up this delicious dessert in no time.
- Versatile Serving Options: Great on its own or paired with ice cream or whipped cream.
- Seasonal Appeal: Perfect for using fresh cherries in summer or canned cherries year-round.
- Comforting Flavor: The combination of sweet cherries and a buttery oat topping makes every bite satisfying.
- Crowd-Pleasing Dessert: Ideal for gatherings, family dinners, or just treating yourself.
Tools and Preparation
Before you start making your Cherry Crisp, gather your tools to ensure a smooth cooking process.
Essential Tools and Equipment
- 9×9-inch baking pan
- Mixing bowls
- Pastry cutter (or fork)
- Measuring cups and spoons
- Parchment paper or silicone baking mat
Importance of Each Tool
- 9×9-inch baking pan: Perfect size for even cooking and easy serving.
- Pastry cutter: Makes blending butter into dry ingredients effortless for a perfect crumble texture.
- Mixing bowls: Essential for combining ingredients without spills or messes.
Ingredients
To create this delicious Cherry Crisp, you’ll need the following ingredients:
For the Topping
- 1 cup flour
- 1 cup old-fashioned oats
- 1 cup light brown sugar (lightly packed)
- 1 teaspoon ground cinnamon
- 1/4 teaspoon ground nutmeg (optional)
- 1/2 teaspoon baking soda
- 1 teaspoon salt
- 12 tablespoons unsalted butter (cold, cubed)
For the Filling
- 2 (21-ounce) cans cherry pie filling (or fresh cherries, see note 1)
How to Make Cherry Crisp
Step 1: Preheat the Oven
Preheat your oven to 350°F (175°C). Line a sheet pan with parchment paper or a silicone baking mat. Lightly grease your 9×9-inch baking pan and set it aside.
Step 2: Prepare the Topping
In a large bowl:
1. Combine flour, oats, brown sugar, cinnamon, nutmeg, baking soda, and salt.
2. Add cold, cubed butter into the dry mixture.
3. Use a pastry cutter to blend until it resembles coarse crumbs. If needed, chill in the refrigerator for about 20 minutes to maintain the texture.
Step 3: Assemble the Cherry Filling
Scoop the cherry pie filling into the greased baking pan:
– Smooth it evenly across the bottom.
– Sprinkle the prepared crumble topping over the cherry filling without pressing it down.
Step 4: Bake
Place your dish in the center of the oven:
– Bake for 40–50 minutes until the topping is golden brown and filling bubbles slightly at the edges.
– If necessary, cover with foil if browning too quickly.
Step 5: Cool and Serve
Once baked:
– Let your Cherry Crisp cool on a rack for 15–20 minutes before serving.
– Enjoy warm with vanilla bean ice cream or fresh whipped cream for an extra indulgence!
How to Serve Cherry Crisp
Cherry Crisp is a delightful dessert that pairs wonderfully with various accompaniments. Whether you’re hosting a dinner party or enjoying a quiet evening at home, these serving suggestions will elevate your Cherry Crisp experience.
With Vanilla Ice Cream
- Vanilla ice cream adds a creamy texture that contrasts beautifully with the warm, fruity filling of the Cherry Crisp.
Drizzled with Chocolate Sauce
- A drizzle of rich chocolate sauce can create an indulgent treat, enhancing the sweetness of the cherries.
Topped with Whipped Cream
- Fresh whipped cream provides a light and airy complement to the Cherry Crisp, making each bite even more enjoyable.
Served in Individual Portions
- Consider serving in small ramekins for a personalized touch. Each person can enjoy their own portion, making it feel special.
Accompanied by Fresh Berries
- A side of fresh berries not only adds color but also brings a tartness that balances the sweetness of the dessert.
Garnished with Mint Leaves
- A few sprigs of mint can add freshness and a pop of color, making your presentation visually appealing.
How to Perfect Cherry Crisp
To achieve the ultimate Cherry Crisp, follow these tips for success in your baking endeavors.
- Use Fresh Ingredients: Fresh cherries will yield a more vibrant flavor compared to canned alternatives. When using canned fillings, ensure they are high quality.
- Chill Your Butter: Keeping your butter cold helps create that perfect crumbly topping. If it softens too much during mixing, consider chilling again before baking.
- Adjust Sweetness: Taste your cherry filling before combining it with the topping. You might want to reduce or enhance the sweetness based on personal preference.
- Don’t Overmix: When blending your topping ingredients, mix just until combined. Overmixing can lead to a dense topping instead of a light crumble.
- Watch Baking Time: Ovens vary; check your dish around the 40-minute mark to avoid overbaking and ensure you have that golden-brown top.
- Let It Cool: Allowing the Cherry Crisp to cool slightly before serving helps set the filling and makes for easier slicing.
Best Side Dishes for Cherry Crisp
Pairing side dishes with Cherry Crisp can enhance your meal experience and add variety to your dessert table.
- Vanilla Yogurt: A spoonful of vanilla yogurt offers creaminess and tanginess that complements the sweet cherries perfectly.
- Cheese Plate: A selection of soft cheeses like brie or goat cheese can provide a savory contrast to the sweet dessert.
- Fruit Salad: A light fruit salad with seasonal fruits adds freshness and balances out the richness of the Cherry Crisp.
- Spiced Nuts: Roasted spiced nuts bring crunch and earthiness, creating an interesting texture alongside your dessert.
- Caramel Sauce: Serve with warm caramel sauce for those who love an extra layer of sweetness drizzled on top.
- Coffee or Tea: A warm cup of coffee or herbal tea can be a soothing way to round off your meal after enjoying Cherry Crisp.
- Chocolate Fondue: For an interactive dessert experience, set up chocolate fondue where guests can dip fruits or pieces of Cherry Crisp.
- Savory Scones: Lightly flavored scones can provide a delightful contrast as a side dish, balancing out the sweetness of the crisp.
Common Mistakes to Avoid
Making Cherry Crisp can be easy, but common mistakes can lead to less-than-perfect results. Here are some pitfalls to watch out for:
- Using warm butter: If you use melted or warm butter, the topping won’t crumble properly. Always start with cold, cubed butter for the best texture.
- Not measuring ingredients accurately: Incorrect measurements can affect the flavor and texture of your Cherry Crisp. Use a kitchen scale or measuring cups for precision.
- Skipping the chilling step: If your topping mixture gets too warm before baking, it may not hold its shape. Chill it for 20 minutes if it feels soft.
- Overbaking or underbaking: Baking times can vary based on ovens. Keep an eye on your crisp; it’s done when the topping is golden and the filling bubbles slightly.
- Ignoring cooling time: Cutting into your Cherry Crisp immediately after baking can result in a messy serving. Allow it to cool for at least 15-20 minutes.
Storage & Reheating Instructions
Refrigerator Storage
- Store in an airtight container for up to 3 days.
- Ensure it’s completely cooled before sealing to prevent moisture buildup.
Freezing Cherry Crisp
- Freeze in an airtight container for up to 3 months.
- For best results, wrap tightly in plastic wrap before placing in a container.
Reheating Cherry Crisp
- Oven: Preheat to 350°F and bake covered with foil for about 15-20 minutes.
- Microwave: Heat individual servings on medium power for 1-2 minutes until warmed through.
- Stovetop: Reheat in a skillet over low heat, stirring occasionally until heated.
Frequently Asked Questions
Here are some common questions about making Cherry Crisp:
Can I use fresh cherries instead of canned?
Yes, you can use fresh cherries! Just ensure they are pitted and possibly sweetened slightly if needed.
What can I substitute for oats?
If you’re looking for an alternative, consider using crushed nuts or coconut flakes as a topping.
How do I make my Cherry Crisp gluten-free?
Use a gluten-free flour blend and ensure your oats are certified gluten-free.
Why is my topping not crumbling?
If your topping isn’t crumbling, it may be due to using melted butter or overmixing. Start with cold butter and mix just until combined.
Final Thoughts
Cherry Crisp is a delightful dessert that balances sweet and tart flavors perfectly. Its versatility allows you to customize it with various fruits or toppings according to your preferences. Whether served warm with ice cream or enjoyed on its own, this recipe is sure to impress!

Cherry Crisp
- Total Time: 1 hour
- Yield: Approximately 8 servings 1x
Description
Indulge in the delightful taste of Cherry Crisp, a perfect dessert that combines the natural sweetness of cherries with a deliciously crumbly oat topping. This easy-to-make treat is ideal for any occasion, whether you’re hosting a gathering or enjoying a cozy night at home. Serve it warm and consider pairing it with vanilla ice cream or whipped cream to create an unforgettable dessert experience. With its comforting flavor and appealing texture, Cherry Crisp is sure to become a favorite in your dessert repertoire.
Ingredients
- 1 cup flour
- 1 cup old-fashioned oats
- 1 cup light brown sugar (lightly packed)
- 1 teaspoon ground cinnamon
- 1/4 teaspoon ground nutmeg (optional)
- 1/2 teaspoon baking soda
- 1 teaspoon salt
- 12 tablespoons unsalted butter (cold, cubed)
- 2 (21-ounce) cans cherry pie filling or fresh cherries
Instructions
- Preheat your oven to 350°F (175°C). Grease a 9×9-inch baking pan and set aside.
- In a large bowl, combine flour, oats, brown sugar, cinnamon, baking soda, and salt. Mix well.
- Add cold, cubed butter and use a pastry cutter to blend until the mixture resembles coarse crumbs.
- Pour cherry pie filling into the prepared pan and spread evenly. Top with the crumble mixture without pressing down.
- Bake for 40–50 minutes until the topping is golden brown and the filling bubbles at the edges.
- Let cool for 15–20 minutes before serving.
- Prep Time: 15 minutes
- Cook Time: 45 minutes
- Category: Dessert
- Method: Baking
- Cuisine: American
Nutrition
- Serving Size: 1 slice (85g)
- Calories: 280
- Sugar: 24g
- Sodium: 160mg
- Fat: 12g
- Saturated Fat: 7g
- Unsaturated Fat: 4g
- Trans Fat: 0g
- Carbohydrates: 41g
- Fiber: 3g
- Protein: 3g
- Cholesterol: 30mg
Keywords: Fresh cherries can be used instead of canned for a vibrant flavor. Consider adding nuts or coconut flakes as topping alternatives. Chill the butter before mixing to ensure a crumbly texture.